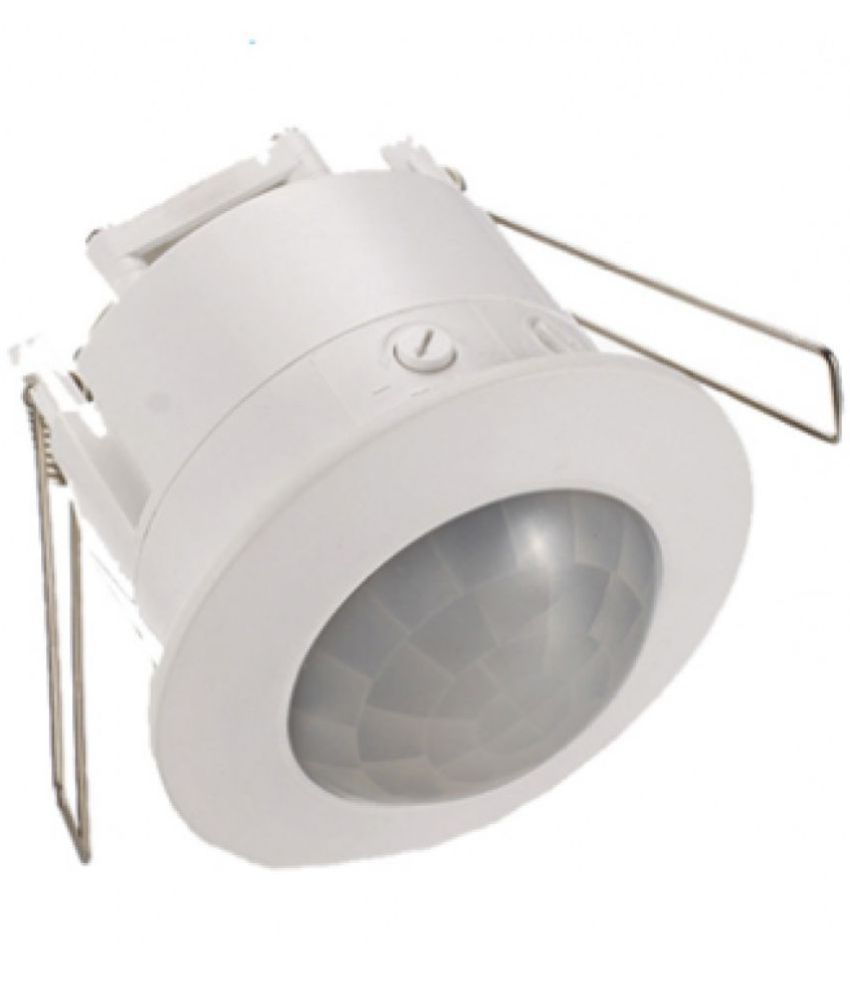
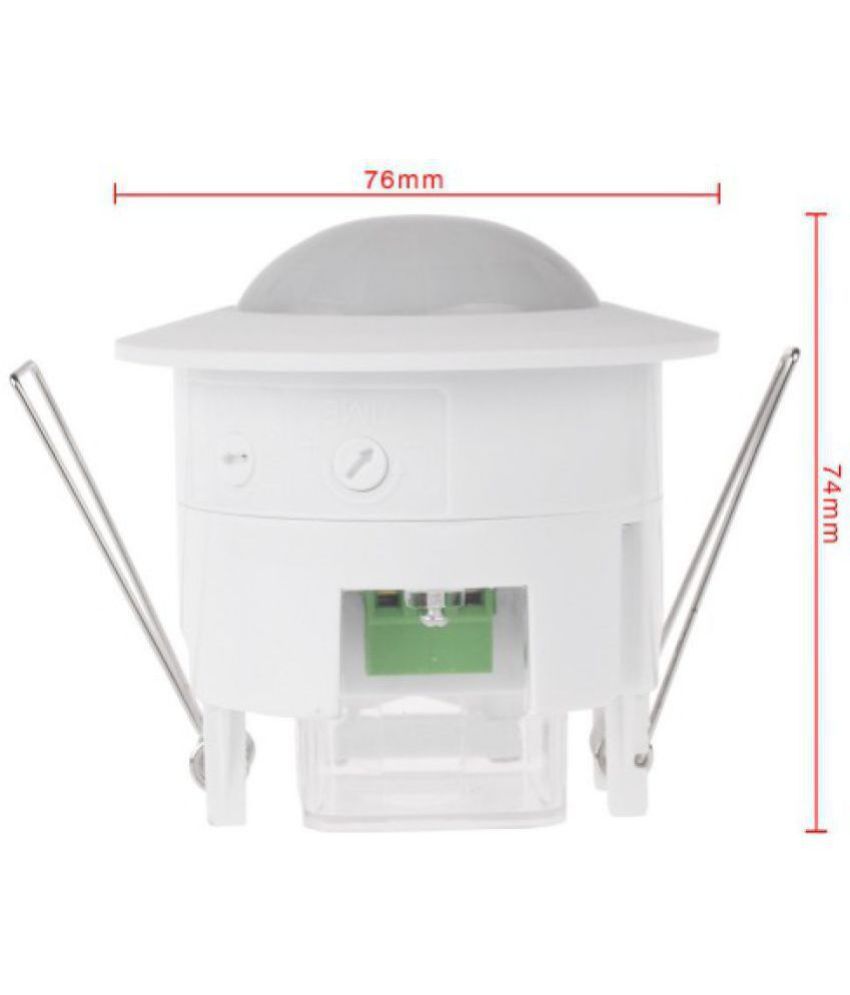
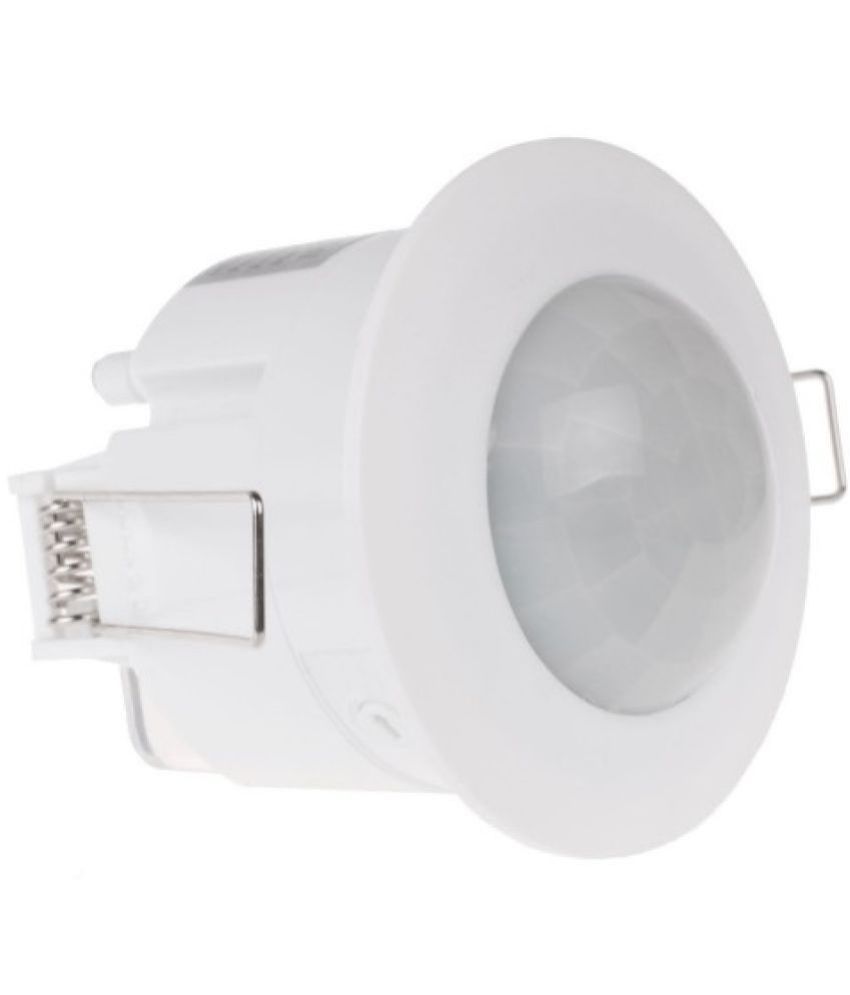
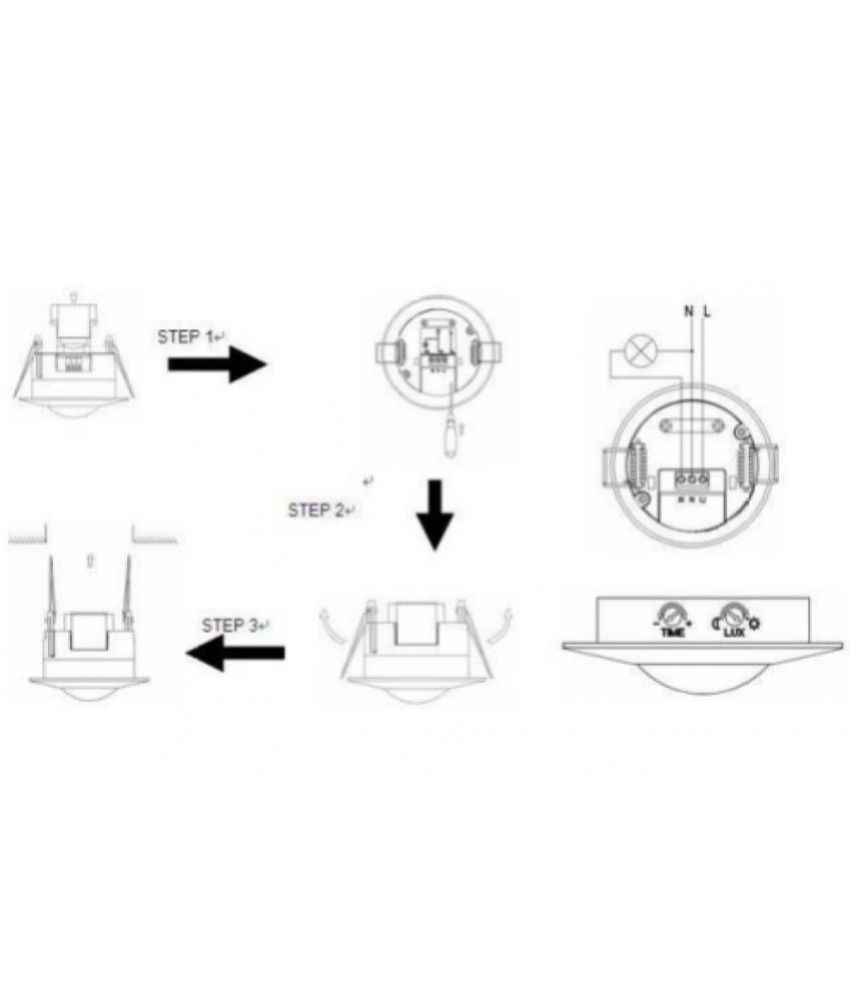
The product adopts good sensitivity detector, integrated circuit. It gathers automatism, convenient safe, saving-energy and practical functions. It utilizes the infrared energy from human as control-signal source, it can start the load at once when one enters detection field. It can identify day and night automatically. It is easy to install and used widely. Specification: 1.Detection Range:360 degree 2.Rated Load:max.1200W 3.Detection Distance: max.6m 4.Time Delay:10sec to 7min(adjustable) Function Identify day and night automatically. Can adjust ambient light according to your desire: when turn to SUN (max), it will work in the daytime and at night. When turn to MOON (min), it will only work under less than 3LUX circumstance. As for Adjustment, please refer to testing way. Time-delay is added continually: when it receives the second induction signal after the first inductor, it will compute time once more on the rest of the first time-delay basic (Set time) . Time-delay adjustment: it can be set according to your desire. The minimum is 10±3 sec; the maximum is 7±2min. Installation: Turn off the power. Moving the transparent vinyl cover what is in the bottom of the sensor. Loosing the screws in the connection terminal, connecting the power and rated load to connection terminal of sensor according to connection sketch map. Tighten the screws; put the transparent vinyl cover into the original station. Folding the metal spring of the sensor to upwards, until they are in "I" position with sensor, then put the sensor into the hole or installation box what is in the ceiling, the size is similar with item. Releasing the spring, the sensor will be set in this installation position. After finishing installing, the sensor could be connected the power and testing it.
 Download App